
Hey there, fellow food lovers! I just have to share my absolute favorite party recipe with you: individual 7 layer dip cups! Trust me when I say these little cups of deliciousness are a total game-changer for any gathering. I’ve made this recipe so many times, and every single time, they disappear faster than I can say “7 layer dip.” Whether it’s a casual get-together or a big celebration, these cups are always a hit! You’ll love how easy they are to prepare and how stunning they look on the table. Let’s dive into why these individual 7 layer dip cups will be the star of your next event!
Why You’ll Love This 7 Layer Dip Cups Recipe
- Easy to Prepare: With just a bit of chopping and layering, you can whip these up in no time.
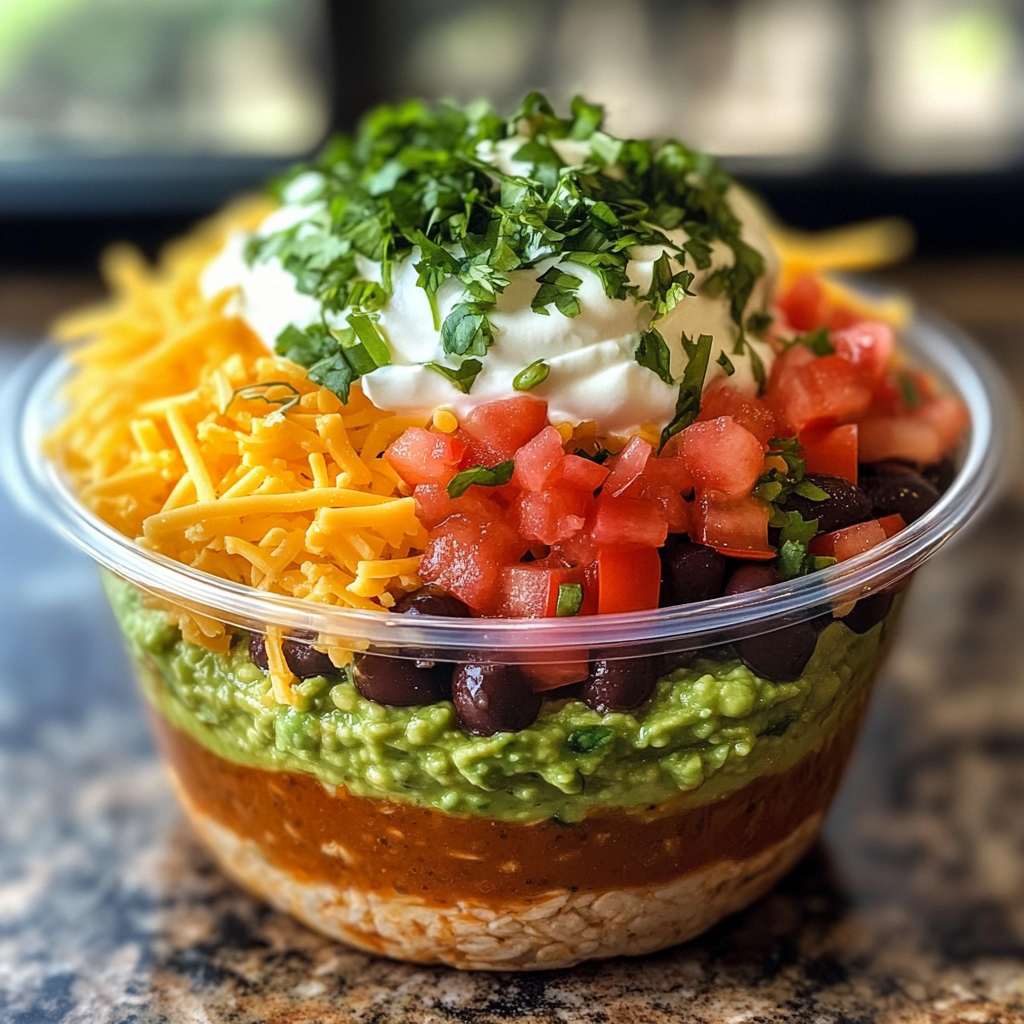
- Visually Stunning: Each cup is a beautiful display of colors and textures that will wow your guests.
- Perfect Portions: Individual servings make it easy for everyone to grab and go, minimizing mess.
- Versatile Options: You can customize the layers to fit your taste preferences or dietary needs.
- Make-Ahead Convenience: Prepare them a day in advance and store them in the fridge for effortless entertaining.
The Secret to Perfect 7 Layer Dip Cups
The key to mastering these 7 layer dip cups lies in the layering technique. I’ve discovered that starting with a sturdy base, like refried beans or guacamole, helps to anchor the other layers. Trust me, it not only keeps everything in place but also enhances the flavors as they meld together. Here’s a little insider tip: use fresh ingredients, especially for the toppings like diced tomatoes and avocado. They bring a burst of flavor that frozen or canned ingredients just can’t match!
Rave Reviews from Friends and Followers
“These 7 layer dip cups were the highlight of my party! Everyone couldn’t stop talking about them. I’ll definitely be making them again!” – Sarah L.
“I was blown away by how simple yet impressive these were! Perfect for my book club gathering.” – Tom R.
“I love the individual servings! They made serving so much easier and looked beautiful on the table.” – Jessica M.
Creative Variations to Try
- Spicy Southwest: Add diced jalapeños and a sprinkle of cayenne for a kick!
- Greek-Inspired: Swap the beans for hummus and add feta cheese, olives, and cucumbers.
- Mexican Street Corn: Include corn, lime juice, and cotija cheese for a unique twist.
- Meat Lover’s Delight: Layer in seasoned ground beef or shredded chicken for added protein.
- Bonus: Create a “build your own” station where guests can customize their own cups!
FAQs – All Your Questions Answered!
Can I make these ahead of time? Absolutely! You can prepare them a day in advance. Just cover them tightly with plastic wrap and store them in the fridge until you’re ready to serve.
What can I substitute if I don’t like a certain ingredient? Feel free to swap out any layer you don’t love. For example, if you’re not a fan of sour cream, you can use Greek yogurt instead!
How long do these last in the fridge? They are best enjoyed within 2-3 days, but they can last up to 5 days if stored properly.
Can I use different cups for serving? Yes! While I love using clear plastic cups for the visual appeal, any small cup or glass will work perfectly.
What if I want to make it vegetarian or vegan? Simply use refried beans that are vegetarian-friendly and substitute dairy products with plant-based options like almond yogurt or dairy-free cheese.
Storage/Serving Tips
- Store in airtight containers in the fridge for up to 5 days.
- Keep layers separate if prepping in advance to maintain freshness.
- Serve with tortilla chips, veggie sticks, or pita chips for a fun twist.
- Garnish with fresh herbs, like cilantro, for an extra pop of flavor.
Perfect Occasions for 7 Layer Dip Cups
- Game Day gatherings
- Summer BBQs or picnics
- Birthday parties
- Bridal or baby showers
- Casual family dinners
- Holiday celebrations
- Any time you want to impress your friends!
The Complete Recipe
Thank you for sticking with me! Now, let’s get to the good stuff: the recipe for these fabulous 7 layer dip cups!
7 Layer Dip Cups
Ingredients
- 1 can (15 oz) refried beans
- 1 cup guacamole
- 1 cup sour cream
- 1 cup salsa
- 1 cup shredded cheese (cheddar or Mexican blend)
- 1 cup diced tomatoes
- 1 cup sliced black olives
- 1/2 cup chopped green onions
Tip: For an extra zing, consider adding a layer of taco seasoning to the sour cream or guacamole!
Optional Add-Ins:
- Chopped jalapeños for heat
- Chopped cilantro for freshness
- Shredded lettuce for crunch
- Different types of beans like black beans or pinto beans for variety
Step-by-Step Instructions
Step 1: Prepare Your Cups
Start by gathering your clear cups. You can use 9 oz plastic cups or small glass jars. Lay them out on a clean surface, ready for assembly!
Step 2: Layer the Refried Beans
Begin with a generous spoonful of refried beans at the bottom of each cup. This will act as the sturdy base for your layers. Make sure to spread it evenly so every bite has that delicious flavor.
Step 3: Add Guacamole
Next, layer on the guacamole. You can use store-bought or homemade, but trust me, fresh guacamole makes all the difference! Spread it gently to avoid disturbing the beans underneath.
Step 4: Add Sour Cream Layer
Now, it’s time for the sour cream. I like to mix it with a bit of taco seasoning for extra flavor. Scoop it on top and smooth it out with the back of your spoon.
Step 5: Pour on the Salsa
Layer on a spoonful of salsa. Choose your favorite kind—chunky or smooth, mild or spicy—whatever suits your palate. This adds moisture and a lovely burst of flavor!
Step 6: Sprinkle the Cheese
Time for cheese! Generously sprinkle shredded cheese over the salsa layer. I recommend a Mexican blend for a delightful mix of flavors. It’s a great way to tie all those layers together.
Step 7: Finish with Toppings
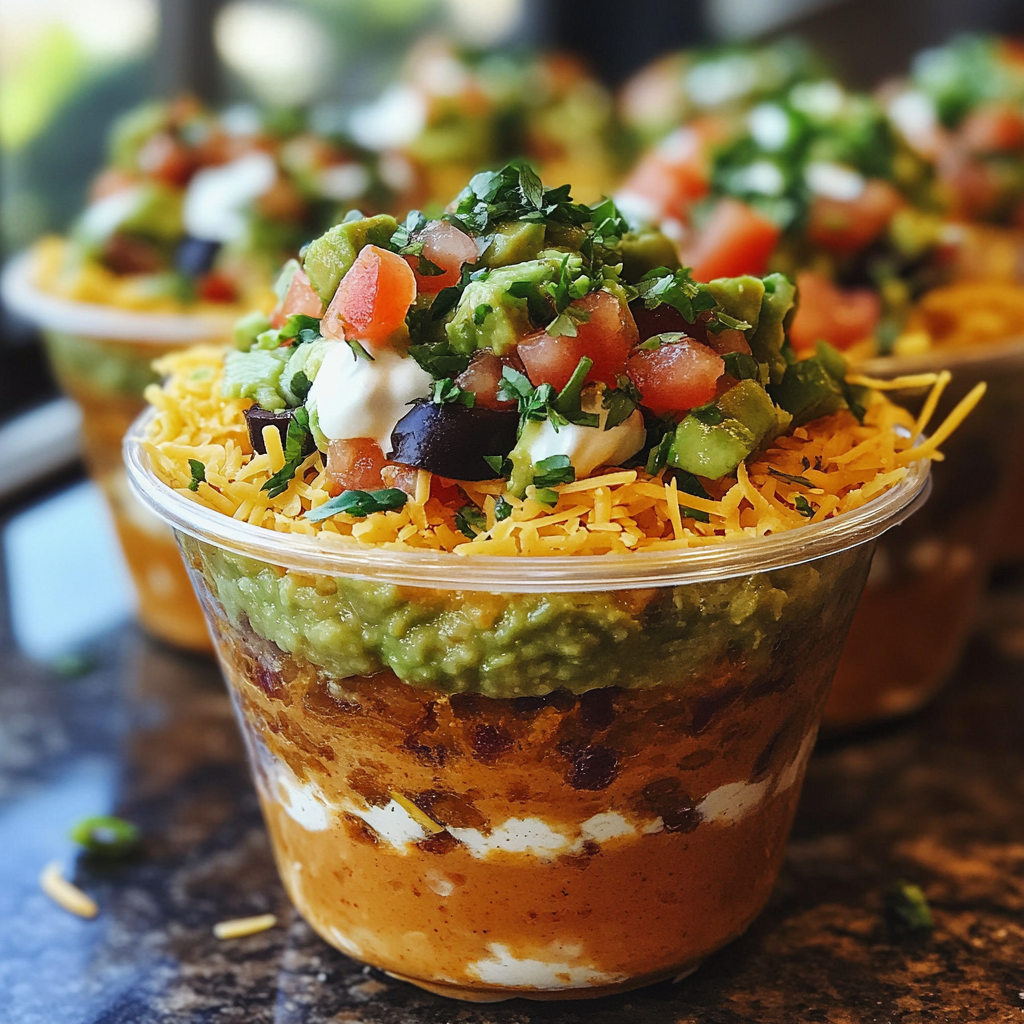
Now for the finishing touches—top each cup with diced tomatoes, sliced olives, and green onions. This not only adds flavor but also creates that wow factor with all the beautiful colors!
Step 8: Chill and Serve
Once you’ve assembled your cups, cover them with plastic wrap and refrigerate until you’re ready to serve. This allows the flavors to meld together beautifully.
Nutrition Info: Each cup is packed with protein, healthy fats, and plenty of fresh veggies, making them a satisfying appetizer that everyone will love.
Final Thoughts
And there you have it—delightful individual 7 layer dip cups that will elevate your next gathering to a whole new level! They’re easy