
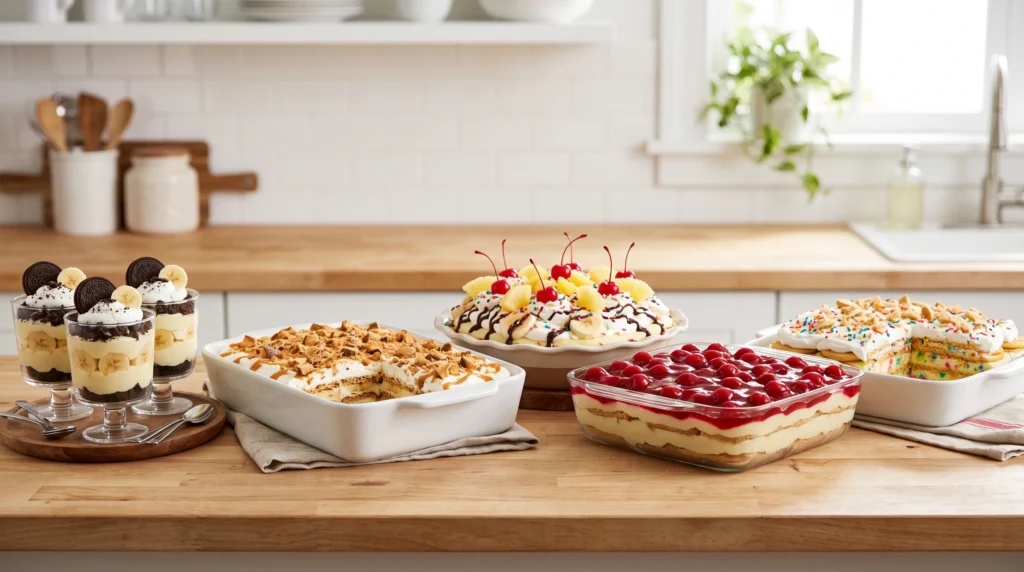
No-bake pudding desserts are perfect when you need an easy homemade treat without spending hours in the kitchen. They are creamy, colorful, beginner-friendly, and made with familiar ingredients that are available at most grocery stores.
These desserts are especially useful for summer parties, family gatherings, birthdays, potlucks, holidays, and busy weekends. Most of the preparation involves whisking instant pudding, folding in Cool Whip, and arranging simple layers in a baking dish or clear serving cups. After a few hours in the refrigerator, the cookies and graham crackers soften while the pudding becomes thick, fluffy, and easy to serve.
This collection includes five easy pudding desserts with different flavors and textures. You will find Oreo banana pudding cups, a crunchy Butterfinger banana pudding lasagna, a colorful banana split icebox cake, a five-ingredient cherry vanilla dessert, and a festive Oreo Funfetti icebox cake.
Each recipe is simple enough for beginners but attractive enough to serve at a celebration. Prepare one for a family dessert, or make several for a large gathering.
Jump to a Recipe
No-Bake Oreo Banana Pudding Cups
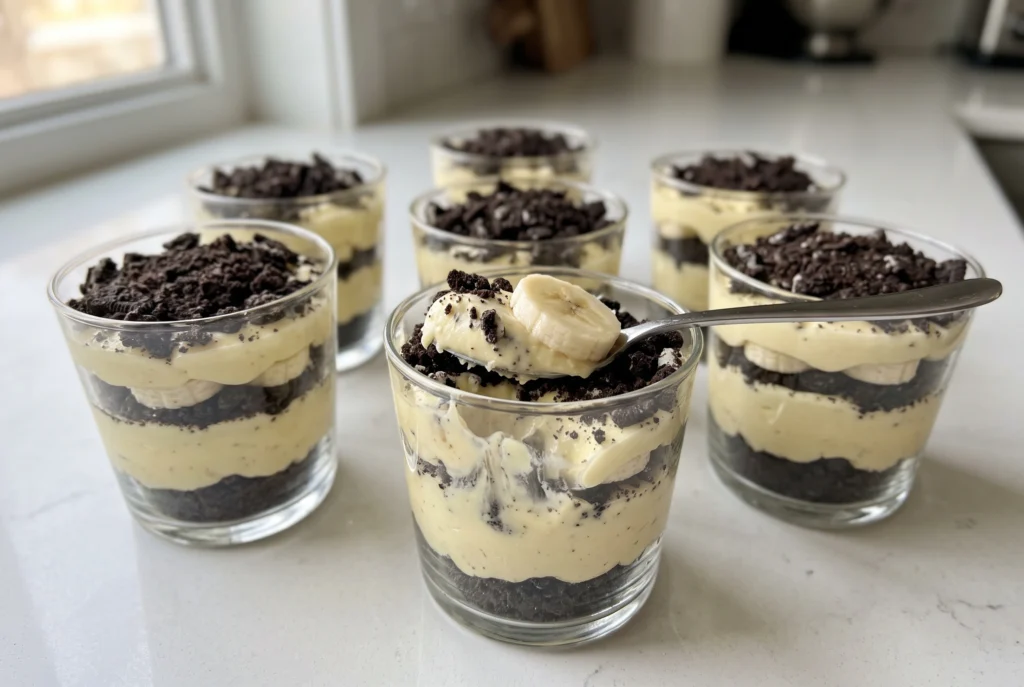
These No-Bake Oreo Banana Pudding Cups combine creamy banana pudding, fluffy Cool Whip, fresh banana slices, and crushed Oreo cookies. The dark chocolate cookie crumbs contrast beautifully with the pale-yellow pudding, making every layer easy to see through the clear cups.
Individual pudding cups are a convenient choice for parties because they are already divided into servings. Guests can pick up a cup without waiting for someone to slice or scoop a larger dessert. They are also easy to store in the refrigerator until serving time.
The combination of chocolate cookies and banana pudding is sweet, creamy, and familiar. The cookies soften slightly as the cups chill but still provide enough texture to contrast with the smooth filling.
Ingredients
- 1 box Jell-O Banana Cream Instant Pudding Mix
- 2 cups whole milk
- 1 tub Cool Whip Original, thawed
- 2 bananas, sliced
- 20 Oreo Cookies, crushed
Instructions
- Pour the Jell-O banana cream pudding mix into a large mixing bowl.
- Add the whole milk and whisk until the mixture becomes smooth and thick.
- Add the thawed Cool Whip to the prepared pudding.
- Gently fold the Cool Whip into the pudding until the mixture is light, fluffy, and evenly combined.
- Add a layer of crushed Oreo cookies to the bottoms of six clear serving cups.
- Spoon a layer of banana pudding over the cookie crumbs.
- Arrange several fresh banana slices over the pudding.
- Add another layer of the banana pudding mixture.
- Sprinkle the remaining crushed Oreo cookies over the tops of the cups.
- Refrigerate for at least 2 hours before serving.
Chilling Time
Chill the pudding cups for at least 2 hours. This gives the pudding time to become firm and allows the Oreo crumbs to soften slightly. Keep the cups refrigerated until you are ready to serve them.
Storage
Cover each cup or place all six cups inside a large covered container. Refrigerate for up to 2 days. These cups are best served as soon as possible because fresh banana slices naturally soften and darken over time.
Butterfinger Banana Pudding Lasagna
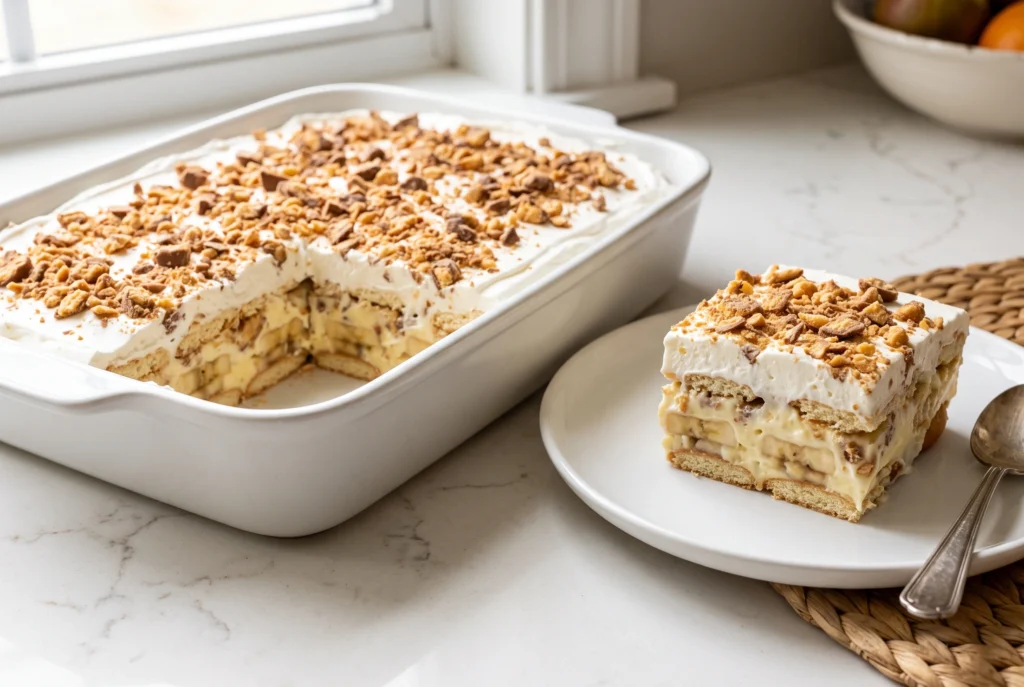
Butterfinger Banana Pudding Lasagna is a fun variation of classic banana pudding. It features layers of Nabisco Nilla Wafers, sliced bananas, creamy banana pudding, Cool Whip, and crushed Butterfinger candy bars.
The Butterfinger pieces add chocolate and peanut butter flavor while giving the dessert a satisfying candy crunch. As the dessert chills, the vanilla wafers absorb moisture from the pudding and develop a soft, cake-like texture.
This dessert is prepared in a 9×13 baking dish, making it a practical option for potlucks, family dinners, holidays, or backyard gatherings. It can be assembled several hours before serving and kept covered in the refrigerator.
Ingredients
- 1 box Jell-O Banana Cream Instant Pudding Mix
- 2 cups whole milk
- 1 tub Cool Whip Original, thawed
- 1 box Nabisco Nilla Wafers
- 3 bananas, sliced
- 6 Butterfinger Candy Bars, crushed
Instructions
- Pour the Jell-O banana cream pudding mix into a mixing bowl.
- Add the whole milk and whisk until the pudding becomes thick and smooth.
- Fold half of the thawed Cool Whip into the pudding mixture.
- Reserve the remaining Cool Whip for the final topping.
- Arrange a single layer of Nabisco Nilla Wafers across the bottom of a 9×13 baking dish.
- Place half of the sliced bananas over the vanilla wafers.
- Spread half of the banana pudding mixture evenly over the banana slices.
- Sprinkle half of the crushed Butterfinger candy bars over the pudding.
- Add another layer of Nilla Wafers.
- Arrange the remaining banana slices over the wafers.
- Spread the remaining banana pudding mixture over the bananas.
- Sprinkle most of the remaining Butterfinger pieces over the pudding.
- Spread the reserved Cool Whip evenly over the top.
- Finish with the remaining crushed Butterfinger candy.
- Cover and refrigerate for at least 4 hours before serving.
Chilling Time
Allow the dessert to chill for at least 4 hours. The resting time is important because it allows the vanilla wafers to soften and helps the layers hold together when served.
Storage
Cover the baking dish tightly and keep it refrigerated. Enjoy the dessert within 2 to 3 days. The texture becomes softer as it sits, and the banana slices may gradually darken.
Banana Split Icebox Cake
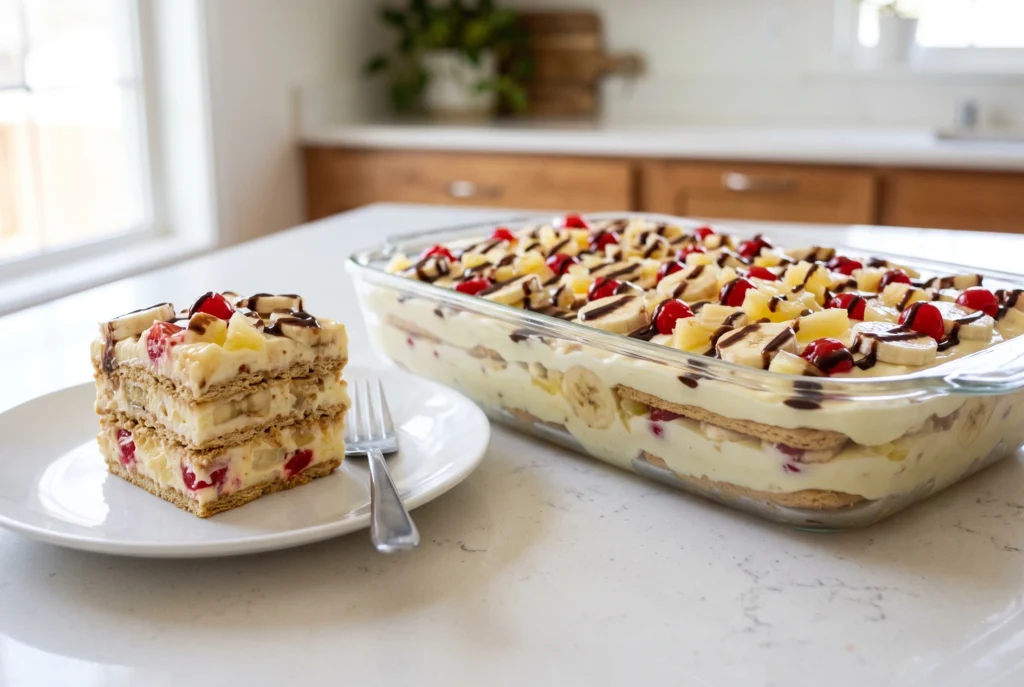
Banana Split Icebox Cake transforms the flavors of a classic banana split into an easy refrigerated dessert. It combines Honey Maid graham crackers, creamy vanilla pudding, Cool Whip, fresh bananas, crushed pineapple, maraschino cherries, and Hershey’s chocolate syrup.
The fruit creates colorful layers that look especially attractive when the dessert is sliced. The graham crackers soften in the refrigerator and develop a tender texture that feels similar to a thin cake layer.
This is an excellent dessert for summer celebrations, family cookouts, birthdays, and potlucks. It provides the familiar flavors of a banana split without requiring ice cream or last-minute assembly.
Ingredients
- 1 box Honey Maid Graham Crackers
- 1 box Jell-O Vanilla Instant Pudding Mix
- 2 cups whole milk
- 1 tub Cool Whip Original, thawed
- 3 bananas, sliced
- 1 can Dole Crushed Pineapple, drained
- 1 jar Maraschino Cherries, drained and chopped
- 1/2 cup Hershey’s Chocolate Syrup
Instructions
- Pour the Jell-O vanilla pudding mix into a large mixing bowl.
- Add the whole milk and whisk until the pudding becomes thick and smooth.
- Fold the thawed Cool Whip into the vanilla pudding until creamy.
- Arrange a single layer of Honey Maid graham crackers across the bottom of a 9×13 baking dish.
- Break a few graham crackers into smaller pieces when needed to cover empty spaces.
- Spread half of the pudding mixture evenly over the graham crackers.
- Arrange half of the sliced bananas over the pudding.
- Spoon half of the drained Dole crushed pineapple over the bananas.
- Sprinkle half of the chopped maraschino cherries over the pineapple.
- Add another layer of Honey Maid graham crackers.
- Spread the remaining pudding mixture over the crackers.
- Add the remaining banana slices, crushed pineapple, and chopped cherries.
- Drizzle the Hershey’s chocolate syrup evenly over the top.
- Cover the dish and refrigerate for at least 4 hours before slicing.
Chilling Time
Chill the icebox cake for at least 4 hours, although leaving it in the refrigerator overnight will produce an even softer texture. The graham crackers need time to absorb moisture from the pudding and fruit.
Storage
Store the cake covered in the refrigerator for up to 2 days. Because the dessert contains fresh bananas, it is best enjoyed shortly after it has finished chilling.
Cherry Vanilla Pudding Icebox Cake
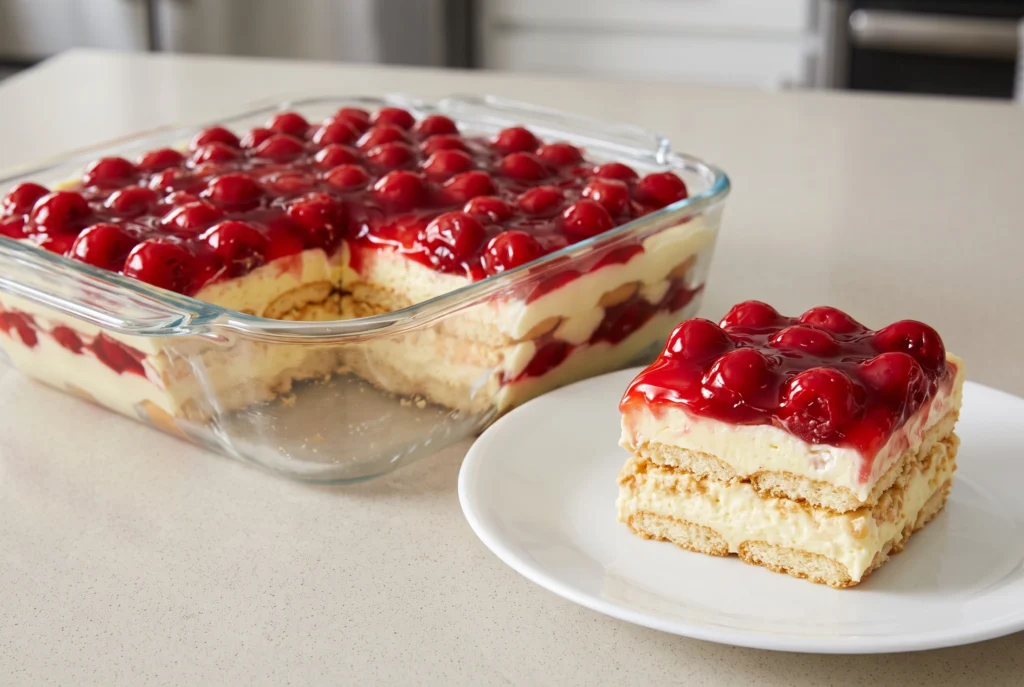
Cherry Vanilla Pudding Icebox Cake is one of the simplest recipes in this collection. It requires only five ingredients and creates attractive red, white, and golden layers.
The combination of creamy vanilla pudding and glossy cherry pie filling gives the dessert a flavor similar to cherry cream pie. Nabisco Nilla Wafers soften as the cake chills and create tender layers between the pudding and fruit.
This recipe is a good choice when you need a quick dessert with minimal preparation. It takes only a few minutes to assemble, and the refrigerator does most of the work.
Ingredients
- 1 box Jell-O Vanilla Instant Pudding Mix
- 2 cups whole milk
- 1 tub Cool Whip Original, thawed
- 1 box Nabisco Nilla Wafers
- 1 can Duncan Hines Comstock Cherry Pie Filling
Instructions
- Add the Jell-O vanilla instant pudding mix to a large bowl.
- Pour in the whole milk.
- Whisk until the pudding becomes thick and smooth.
- Fold the thawed Cool Whip into the prepared pudding.
- Continue folding until the mixture is creamy and evenly combined.
- Arrange a layer of Nabisco Nilla Wafers across the bottom of an 8×8 baking dish.
- Spread half of the vanilla pudding mixture evenly over the wafers.
- Spoon half of the Duncan Hines Comstock cherry pie filling over the pudding.
- Gently spread the cherry filling without completely mixing it into the pudding.
- Add another layer of Nilla Wafers.
- Spread the remaining vanilla pudding mixture over the wafers.
- Spoon the remaining cherry pie filling over the top.
- Cover and refrigerate for at least 4 hours before slicing or scooping.
Chilling Time
The cake needs at least 4 hours in the refrigerator. This allows the vanilla wafers to soften and gives the pudding enough time to become firm. For an extra-soft icebox cake texture, prepare it the night before serving.
Storage
Keep the dessert tightly covered in the refrigerator. It is best enjoyed within 3 days. The wafer layers will continue to soften, but the flavor will remain creamy and delicious.
Oreo Funfetti Icebox Cake
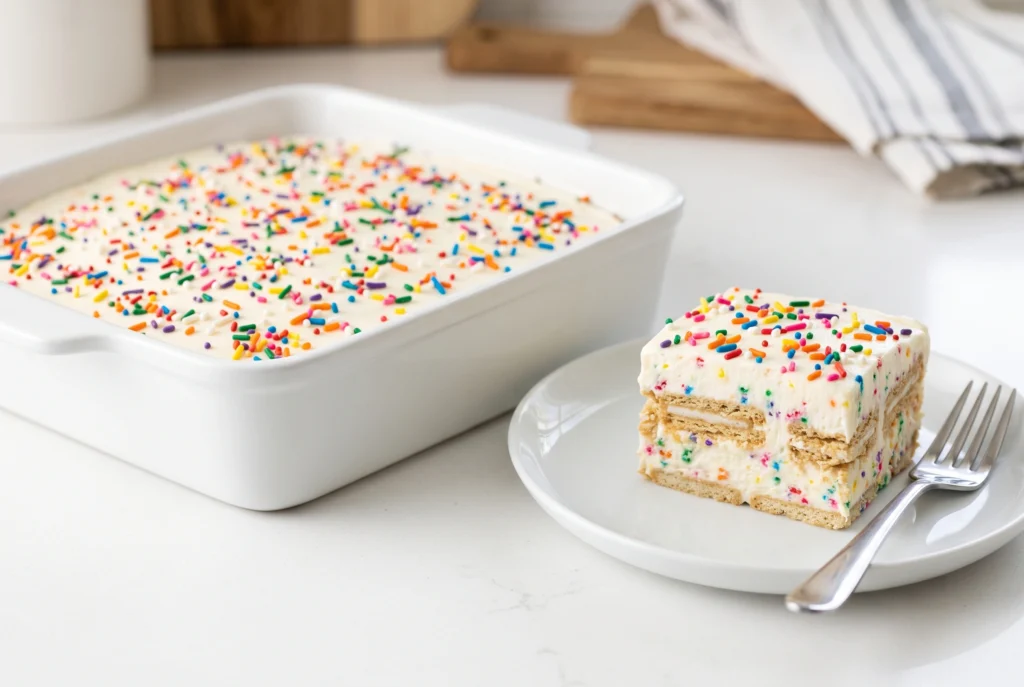
Oreo Funfetti Icebox Cake is a colorful no-bake dessert that is perfect for birthdays and celebrations. Golden Oreo sandwich cookies are layered with white chocolate pudding, Cool Whip, and bright Betty Crocker rainbow sprinkles.
The finished cake has a cheerful party-cake appearance without requiring an oven, frosting, or complicated decorating. As the dessert chills, the Golden Oreos soften and create tender cookie layers inside the fluffy pudding filling.
This recipe is especially convenient because it can be assembled ahead of time. Keep it refrigerated until the celebration begins, then slice it directly from the baking dish.
Ingredients
- 1 box Jell-O White Chocolate Instant Pudding Mix
- 2 cups whole milk
- 1 tub Cool Whip Original, thawed
- 24 Oreo Golden Sandwich Cookies
- 1/2 cup Betty Crocker Rainbow Sprinkles
Instructions
- Pour the Jell-O white chocolate pudding mix into a mixing bowl.
- Add the whole milk and whisk until the pudding is smooth and thick.
- Fold the thawed Cool Whip into the white chocolate pudding.
- Continue folding until the mixture becomes light and creamy.
- Arrange a layer of Oreo Golden Sandwich Cookies across the bottom of an 8×8 baking dish.
- Spread half of the pudding mixture evenly over the cookies.
- Sprinkle half of the Betty Crocker rainbow sprinkles over the pudding.
- Add another layer of Golden Oreo cookies.
- Spread the remaining pudding mixture over the cookies.
- Sprinkle the remaining rainbow sprinkles evenly across the top.
- Cover the baking dish and refrigerate for at least 4 hours before slicing.
Chilling Time
Refrigerate the cake for at least 4 hours so the cookies can soften and the filling can set. Overnight chilling will create an even softer, more cake-like texture.
Storage
Cover the baking dish and refrigerate for up to 3 days. Keep the dessert cold until serving so the pudding filling remains firm.
How to Store No-Bake Pudding Desserts
All five desserts in this collection should remain refrigerated. Pudding and Cool Whip can become too soft when left at room temperature for long periods, especially during warm weather.
Cover large desserts tightly with plastic wrap, aluminum foil, or a fitted lid. Individual pudding cups can be covered separately or stored together inside a large airtight container.
Return leftovers to the refrigerator as soon as everyone has been served. For the best flavor and texture, enjoy most pudding desserts within 2 to 3 days.
Recipes containing fresh banana slices are best served sooner because bananas naturally soften and darken. This change does not necessarily mean the dessert is spoiled, but it may affect the appearance.
Icebox cakes often become softer after an additional night in the refrigerator. Some people prefer this extra-soft texture, while others enjoy the dessert when the cookie layers still have a little structure.
Which Dessert Should You Make First?
Choose the No-Bake Oreo Banana Pudding Cups when you want attractive individual portions that are easy to serve. They are ideal for small parties, family desserts, and occasions when you do not want to cut a larger cake.
Make the Butterfinger Banana Pudding Lasagna when you want a rich dessert with banana, chocolate, peanut butter, and candy crunch. The 9×13 size makes it a practical choice for a larger gathering.
Try the Banana Split Icebox Cake when you want a colorful summer dessert filled with fruit and chocolate syrup. Its bright layers make it especially appealing for birthdays and cookouts.
Prepare the Cherry Vanilla Pudding Icebox Cake when you need the simplest option. It requires only five ingredients and delivers creamy vanilla and cherry flavor with very little work.
Choose the Oreo Funfetti Icebox Cake for birthdays, celebrations, school events, or any occasion that calls for a festive dessert. The rainbow sprinkles and Golden Oreo layers create a fun party appearance.
Final Thoughts
These five no-bake pudding desserts prove that an impressive homemade treat does not need to be complicated. With instant pudding, Cool Whip, cookies, fruit, and a little refrigerator time, you can prepare a creamy dessert that is ready to share with family and friends.
Save this collection for your next birthday, potluck, summer cookout, holiday gathering, or weekend dessert. Start with the recipe that matches your favorite flavor, then return and try the others whenever you need another easy no-bake idea.