

Let me tell you about one of my all-time favorite recipes: crispy homemade garlic bread! I can’t even count how many times I’ve made this delectable treat, but every single time, it disappears faster than I can pull it out of the oven! The aroma of garlic wafting through the kitchen is enough to get anyone excited, and trust me, the first bite will leave you wanting more. If you’re looking for a game-changer in your snack or side dish repertoire, this is it!
Why You’ll Love This Crispy Homemade Garlic Bread
- Easy to Make: With just a few simple ingredients, you can whip this up in no time!
- Versatile: Perfect as an appetizer, side dish, or even a snack on its own!
- Incredible Flavor: The combination of garlic, herbs, and melty cheese is simply irresistible!
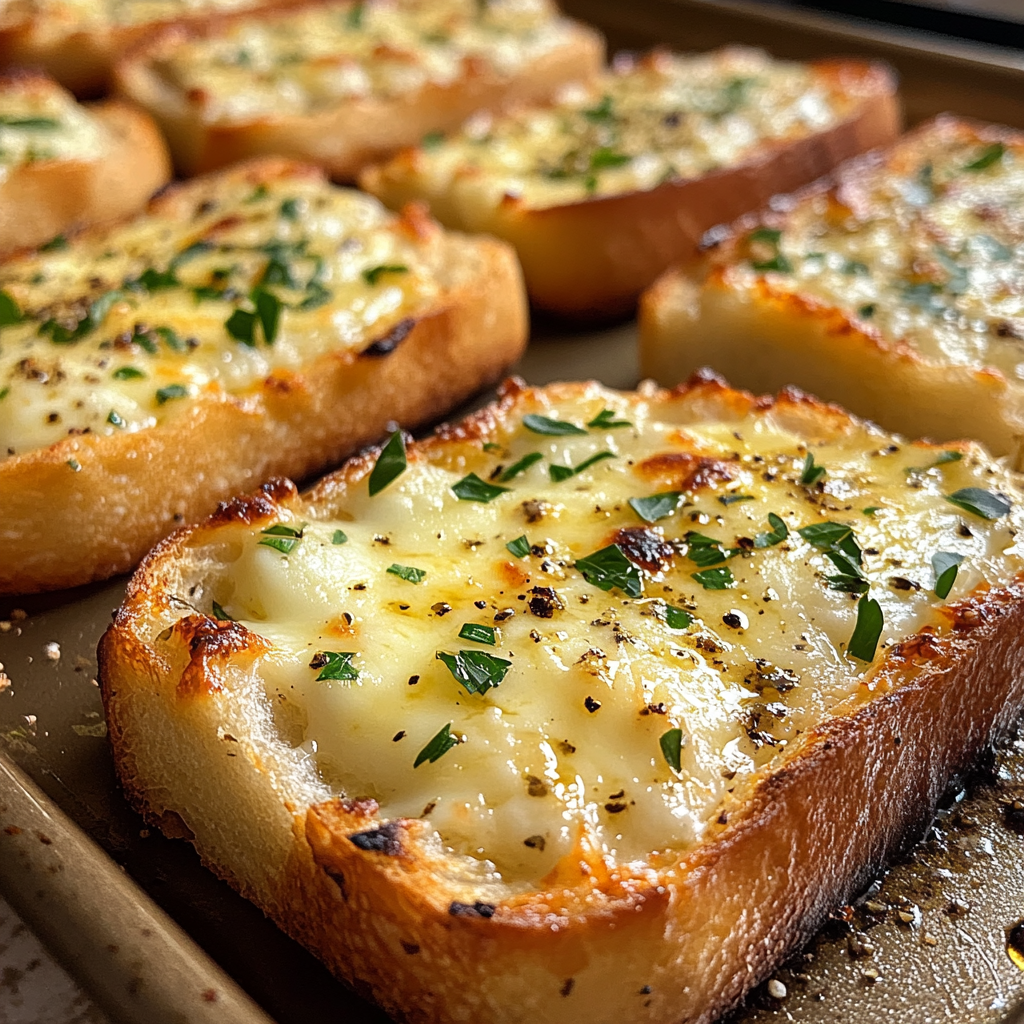
- Visual Appeal: Golden and crunchy, it looks just as good as it tastes!
- Make-Ahead Convenience: You can prepare it in advance and bake it right before serving!
The Secret to Perfect Crispy Homemade Garlic Bread
The secret to achieving that perfect crispy texture lies in the baking method and the blend of herbs and cheese you use. I’ve experimented a lot, and I found that using both butter and olive oil gives the bread that golden crunch while keeping it flavorful. Plus, adding a mix of fresh and dried herbs elevates the taste to another level. Trust me, it’s a technique that anyone can master with just a little practice!
Rave Reviews from Friends and Followers
“This garlic bread is a total game-changer! The crispy texture and the cheesy goodness had my family raving about it for days!” – Sarah M.
“I’ve tried many garlic bread recipes, but this one is by far the best! It’s so easy and absolutely delicious!” – Mike T.
“I made this for a dinner party, and it was the hit of the night! Everyone asked for the recipe!” – Jessica R.
Creative Variations to Try
- Herb-Infused: Experiment with different herbs like rosemary, thyme, or basil for a unique flavor!
- Cheesy Delight: Add different kinds of cheese such as mozzarella, parmesan, or cheddar for extra cheesy goodness!
- Spicy Twist: Mix in some red pepper flakes for a little kick!
- Garlic Butter Spread: Replace the butter with a garlic-infused oil for a more intense garlic flavor.
Bonus: Try adding sautéed mushrooms or sun-dried tomatoes for a gourmet touch!
FAQs – All Your Questions Answered!
Can I use a different type of bread? Absolutely! While a baguette or Italian bread works best, you can use any bread you have on hand, like sourdough or even sandwich bread. Just adjust the baking time accordingly.
How do I store leftover garlic bread? Store any leftovers in an airtight container at room temperature for up to two days. You can also freeze it for longer storage.
Can I make this ahead of time? Yes! You can prepare the garlic butter mixture and spread it on the bread ahead of time. Just cover it and store it in the fridge until you’re ready to bake.
What if I don’t have fresh garlic? You can use garlic powder or garlic salt as a substitute, but fresh garlic gives the best flavor!
How do I reheat garlic bread? To maintain its crispy texture, reheat in a toaster oven or regular oven at 350°F (175°C) for about 5-10 minutes.
Storage/Serving Tips
- Store in an airtight container or wrapped tightly in foil.
- Best enjoyed fresh, but can be stored for 1-2 days at room temperature.
- Reheat for an extra crispy experience before serving.
- Serve alongside pasta, salads, or as a standalone snack.
Perfect Occasions for Crispy Homemade Garlic Bread
- Family dinners and gatherings.
- Game day parties or movie nights.
- Barbecues or outdoor picnics.
- Holiday celebrations and get-togethers.
- As a delicious appetizer for any meal!
The Complete Recipe
Thank you for sticking with me! Now, let’s get to the mouthwatering recipe you’ve been waiting for!
Crispy Homemade Garlic Bread
Ingredients
- 1 loaf of French or Italian bread
- ½ cup unsalted butter, softened
- ¼ cup extra virgin olive oil
- 4-6 cloves of garlic, minced
- 1 teaspoon dried oregano
- 1 teaspoon dried parsley
- 1 cup shredded mozzarella cheese
- Salt and pepper to taste
Tip: For a stronger garlic flavor, you can roast the garlic before using it in the recipe. This gives a sweeter, more mellow taste that’s to die for!
Step-by-Step Instructions
Step 1: Preheat the Oven
Start by preheating your oven to 400°F (200°C). This ensures that your garlic bread will bake evenly and get that perfect crispiness you’re craving.
Step 2: Prepare the Garlic Butter
In a mixing bowl, combine the softened butter, olive oil, minced garlic, oregano, and parsley. Mix well until all the ingredients are fully incorporated. This is where the flavor magic happens, so make sure to taste it and adjust the seasoning with salt and pepper.
Step 3: Slice the Bread
Slice the loaf of bread in half lengthwise. If you want individual pieces, you can cut it into slices, but I prefer keeping it whole for a more rustic presentation. Lay the bread cut-side up on a baking sheet lined with parchment paper.
Step 4: Spread the Mixture
Generously spread the garlic butter mixture over the cut sides of the bread. Don’t be shy here; you want every bite to be packed with flavor! Then, sprinkle the shredded cheese evenly over the top, making sure to cover every inch.
Step 5: Bake
Place the baking sheet in the oven and bake for about 10-15 minutes, or until the cheese is melty and the edges of the bread are golden brown. Keep an eye on it towards the end, as oven temperatures can vary!
Step 6: Serve and Enjoy!
Once out of the oven, let it cool for a minute before cutting it into pieces. Serve warm and watch as your friends and family devour it! You’ll have smiles all around, and trust me, they’ll be asking for more!
Nutrition info (per serving): Calories: 250, Fat: 15g, Carbs: 22g, Protein: 6g. Keep in mind that these numbers can vary based on specific ingredients and portion sizes.
Final Thoughts
If you haven’t yet tried making crispy homemade garlic bread, what are you waiting for? This recipe is not just delicious; it’s an experience that brings loved ones together. The combination of flavors will have you hooked, and I can guarantee it will become a staple in your home just as it has in mine. So roll up your sleeves, grab those ingredients, and let’s make some magic happen in the kitchen!