
Let me tell you about the first time I made homemade sourdough bread. The moment I pulled that golden-brown loaf from the oven, my kitchen filled with the most heavenly aroma, and I couldn’t help but feel like a baking superstar! I’ve made this recipe countless times since then, and each time it brings pure joy—trust me, there’s nothing quite like the feeling of crafting your own artisanal bread. If you’re ready to embark on your own baking adventure, you’re in for a treat! This guide is packed with tips, tricks, and everything you need to know to make delicious homemade sourdough bread for beginners.
Why You’ll Love This Homemade Sourdough Bread
- Easy to Follow: Perfect for beginners, the steps are straightforward and forgiving.
- Customizable: You can play with flavors and ingredients to make it your own!
- Deliciously Tangy: The natural fermentation process gives it an amazing depth of flavor.
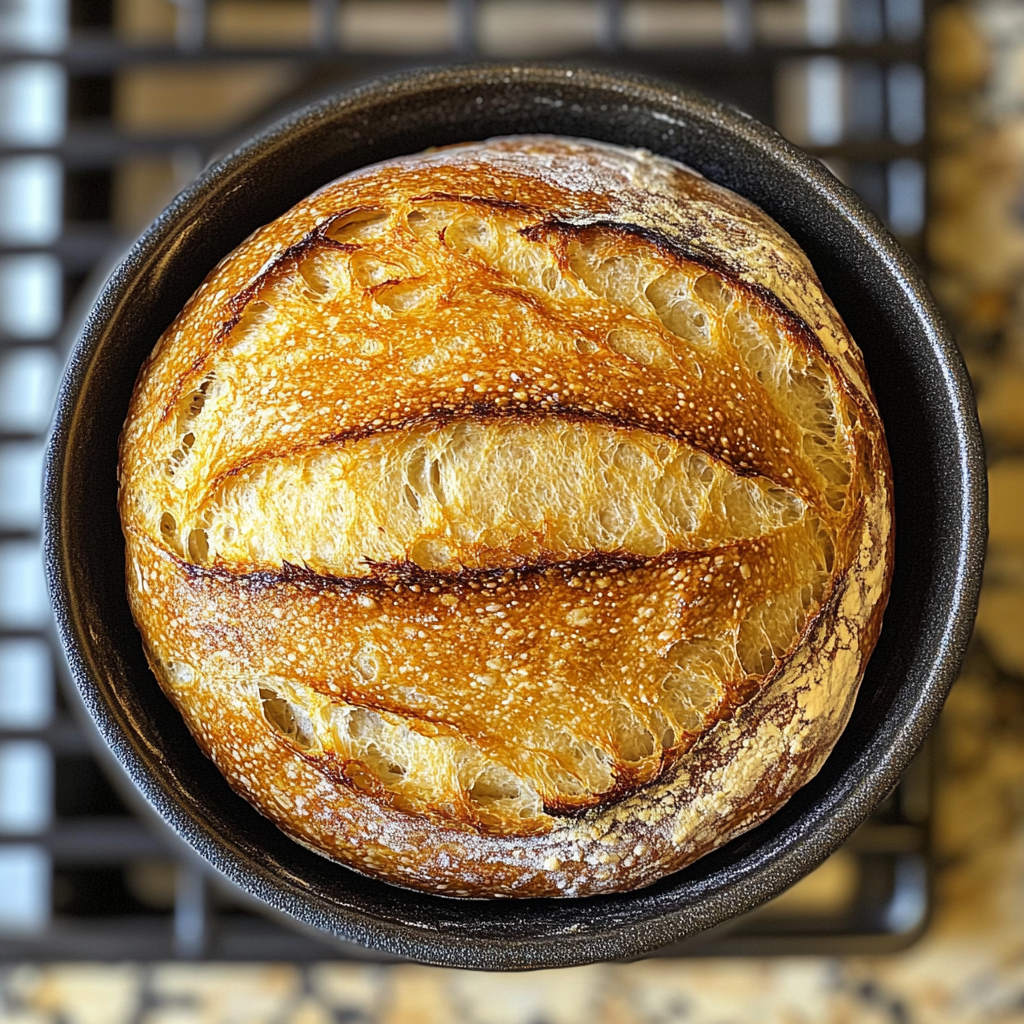
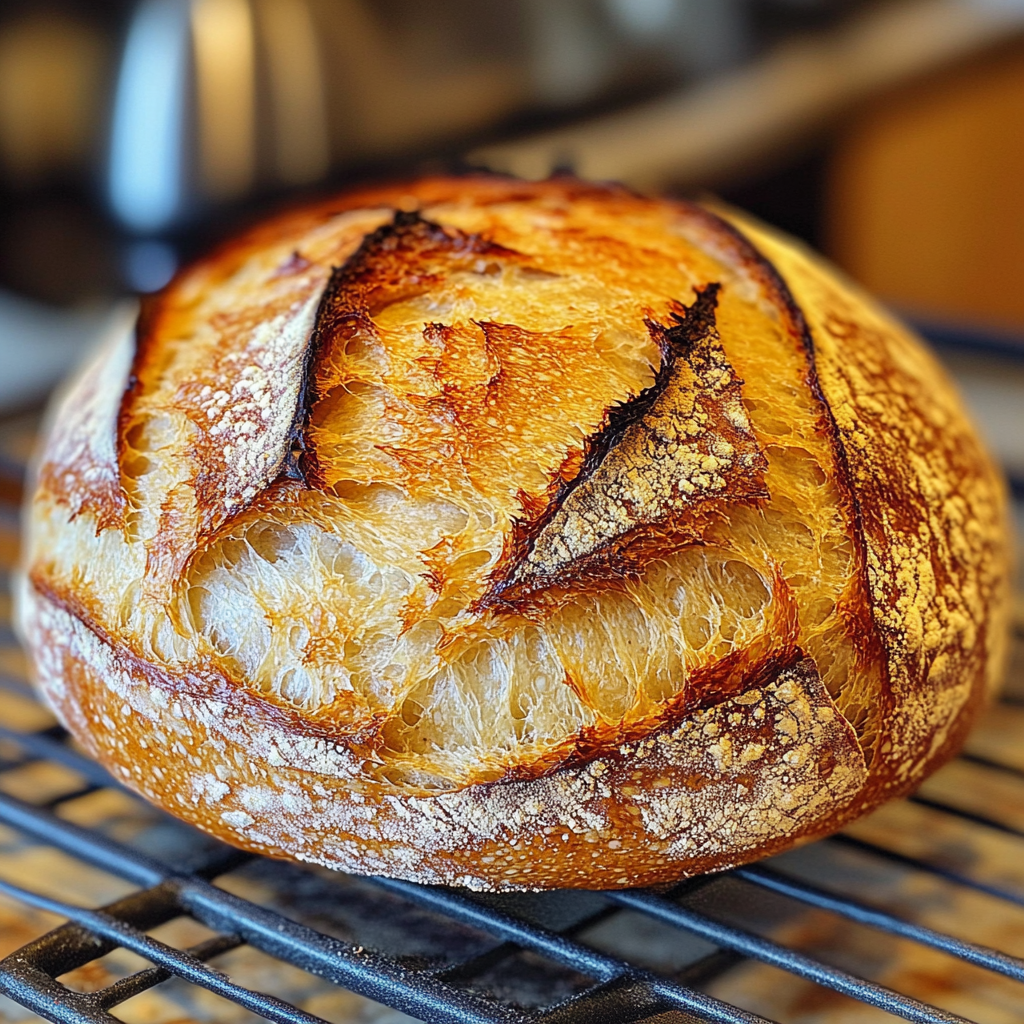
- Visual Appeal: You’ll impress everyone with that beautiful crust and airy crumb structure.
- Make-Ahead Convenience: The dough can be prepared in advance, making it easier to fit into your schedule.
The Secret to Perfect Homemade Sourdough Bread
The real magic of homemade sourdough bread lies in the sourdough starter, a mixture of flour and water that ferments over time, capturing wild yeast and bacteria from the environment. This is what gives sourdough its signature tang and fluffy texture. Don’t worry if you’re new to this; the process is easier than it sounds! My insider tip? Be patient! The longer you let your dough rise, the better the flavor. You’ll be amazed at how simple steps can lead to such a delicious result—you can do this!
Rave Reviews from Friends and Followers
“I tried this recipe on a whim and ended up with the best bread I’ve ever tasted! My family couldn’t believe I made it myself!” – Sarah H.
“This sourdough is a game-changer! It was so easy to follow, and the taste blew everyone away at my dinner party!” – Mark T.
“I was nervous about baking bread, but this guide made it so fun. Now, I’ve become the bread baker of the family!” – Lisa R.
Creative Variations to Try
- Herb Infused: Add fresh rosemary or thyme for a fragrant twist.
- Cheesy Delight: Mix in shredded cheese for a savory surprise.
- Nuts and Seeds: Toss in walnuts or sunflower seeds for added texture.
- Dried Fruits: Incorporate raisins or cranberries for a sweet contrast.
Bonus: Experiment with different flours like whole wheat or rye for unique flavors!
FAQs – All Your Questions Answered!
- How do I store my sourdough bread? Keep it wrapped in a cloth or in a bread box at room temperature for up to 3 days, or freeze it for longer storage.
- Can I use all-purpose flour instead of bread flour? Yes! While bread flour gives the best texture, all-purpose flour will still yield a delicious loaf.
- What if my dough isn’t rising? Make sure your starter is active and bubbly. If not, give it more time and warmth to ferment.
- How can I tell when my bread is done? It should sound hollow when tapped on the bottom, and the crust should be golden brown.
Storage/Serving Tips
- Store in a cool, dry place, wrapped in a cloth or in a paper bag to maintain crust.
- For longer shelf life, slice and freeze individual pieces for easy access.
- Serve fresh with butter, or use it for delicious sandwiches and toasts.
Perfect Occasions for Homemade Sourdough Bread
- Weekend brunch with friends or family
- Cozy evenings by the fireplace
- Potlucks or gatherings—everyone will want a slice!
- Gifts for neighbors or loved ones
- Celebrating special occasions like anniversaries or holidays
The Complete Recipe
Thank you for joining me on this sourdough journey! Now, let’s get into the nitty-gritty of the recipe.
Homemade Sourdough Bread
Ingredients
- 500g bread flour
- 350g water (room temperature)
- 100g active sourdough starter
- 10g salt
Tip: Make sure your sourdough starter is bubbly and active for the best results. You can also add optional ingredients like herbs, cheese, or seeds to customize your bread!
Step-by-Step Instructions
Step 1: Mix the Dough
In a large bowl, combine the bread flour and water. Mix until there are no dry bits left. The dough will be shaggy and sticky—that’s exactly what you want! Cover the bowl with a damp cloth and let it rest for about 30 minutes. This is called autolyse, and it helps to develop the gluten.
Step 2: Add the Starter and Salt
After resting, add the sourdough starter and salt to the dough. Use your hands to pinch and fold the dough until the starter and salt are fully incorporated. It may feel tough at first, but keep at it! Cover again and let it rest for another 30 minutes.
Step 3: Bulk Fermentation
Now comes the fun part! Let the dough rise for 4-6 hours at room temperature. Every 30 minutes, perform a series of stretch and folds: wet your hands and pull a section of the dough up, then fold it over itself. This builds strength in the dough, which is key for that airy texture!
Step 4: Shape the Loaf
Once the dough has doubled in size, gently turn it out onto a floured surface. Shape it into a round loaf by tucking the edges into the center. Let it rest for 20 minutes, then perform a final shaping. Place it seam-side down in a well-floured proofing basket or bowl.
Step 5: Final Proof
Cover the dough and let it proof for another 2-4 hours at room temperature, or overnight in the fridge for more complex flavors. If you’re short on time, a warm spot in your kitchen can speed this up!
Step 6: Preheat the Oven
About 30 minutes before baking, preheat your oven to 450°F (230°C) and place a Dutch oven inside to heat up. This will create the perfect steam environment for your bread.
Step 7: Bake the Bread
Carefully remove the hot Dutch oven and place your loaf inside. Score the top with a sharp knife to allow for expansion during baking. Cover and bake for 30 minutes. After that, remove the lid and bake for an additional 15-20 minutes until golden brown. Your kitchen will smell incredible!
Step 8: Let It Cool
Once baked, transfer the bread to a wire rack and let it cool completely before slicing. I know it’s hard to resist, but trust me, it’s worth the wait for the best texture!
Nutrition info (per slice): Approximately 70 calories, 1g protein, 0.5g fat, 14g carbohydrates.
Final Thoughts
There you have it! Homemade sourdough bread that will make your kitchen the coziest place to be. I can’t express enough how special this recipe is; it’s not just about the bread but the entire experience of making it. I encourage you to give it a try—once you do, you’ll understand why so many people fall in love with baking